6.8 KiB
Introduction
So far we've learnt how to create, update and destroy infrastructure and use variables in our code so we can reuse what we've written over multiple enviroments. One thing you may have noticed while running the examples is that theres a file (sometimes two) created in you working directory in CloudShell called terraform.tfstate (and maybe terraform.tfstate.backup). This is the state files that terraform/tofu uses to keep track of whats actually been deployed and any data that might returned by the provider, such as public_ip address which we used in our previous example.
Now the problem of this state file being local is that only you have access to it. If you work in a team or even from different computers your self you are going to want to store that statefile somewhere it can be easily read and updated. Now you mightthing great I'll commitit to git, but this is a bad idea, it can easily get out of sync and that can lead to all kinds of ugly problems. Fortunately terraform/tofu supplies us with a solution, these are called backends and there are lots of them, you can store your state in a consul cluster for example, an HTTP endpoint in Gitlab and the one we are going to use as these examples are in AWS is DynamoDB and S3. S3 will store the actual state file and we are going use DynamoDB to provide a lock flag that stops multiple people trying to update the stack at the same time, which would end in tears!
Setting up AWS
As this is a terraform/tofu workshop we aren't going to use clickops to make these resources we are going to use IaC of course. So start by creating a new directory in the 3-remote-states/ directory called state
mkdir state
cd state
Now lets make some really simple terraform for this, create a new file called main.tf
vi main.tf
and lets add the following code:
provider "aws" {
  region = "eu-west-1"
}

resource "aws_s3_bucket" "tfstate_bucket" {
  bucket = var.bucket_name
  acl    = "private"

  versioning {
    enabled = true
  }

  lifecycle {
    prevent_destroy = false
  }

  tags = {
    Name = "${var.environment}-s3"
  }
}

resource "aws_dynamodb_table" "remotestate_table" {
  name           = var.table_name
  hash_key       = "LockID"
  billing_mode   = "PAY_PER_REQUEST"

  attribute {
    name = "LockID"
    type = "S"
  }

  tags = {
    Name = "${var.environment}-Dynamo"
  }
}
You'll notice in here we are creating an S3 bucket and a table in dynamoDB. These are going to be used to save our state from our main stack. It also includes some variables and we'll define those in a moment.
Now save and exit and create a new file called versions.tf
vi versions.tf
Lets add the following content:
terraform {
  required_version = ">= 1.0"

  required_providers {
    aws = {
      source  = "hashicorp/aws"
      version = ">= 4.66.1"
    }
  }
}
Save and exit and now lets create our variables.tf file:
vi variables.tf
An we want to set up the following, I've delibarately left out the default values for the bucket_name and the table_name. This is because I want you to use unquie values, you'll be prompted for these soon!
Note
S3 buckets are in a global name space so your bucket_name must be unquie!
variable "environment" {
  description = "Default environment"
  type        = string
  default     = "demo"
}

variable "bucket_name" {
  description = "Name for S3 Bucket"
  type        = string
}

variable "table_name" {
  description = "Name for DynamoDB Table"
  type        = string
}
Now lets deploy these resources.
tofu init
tofu plan
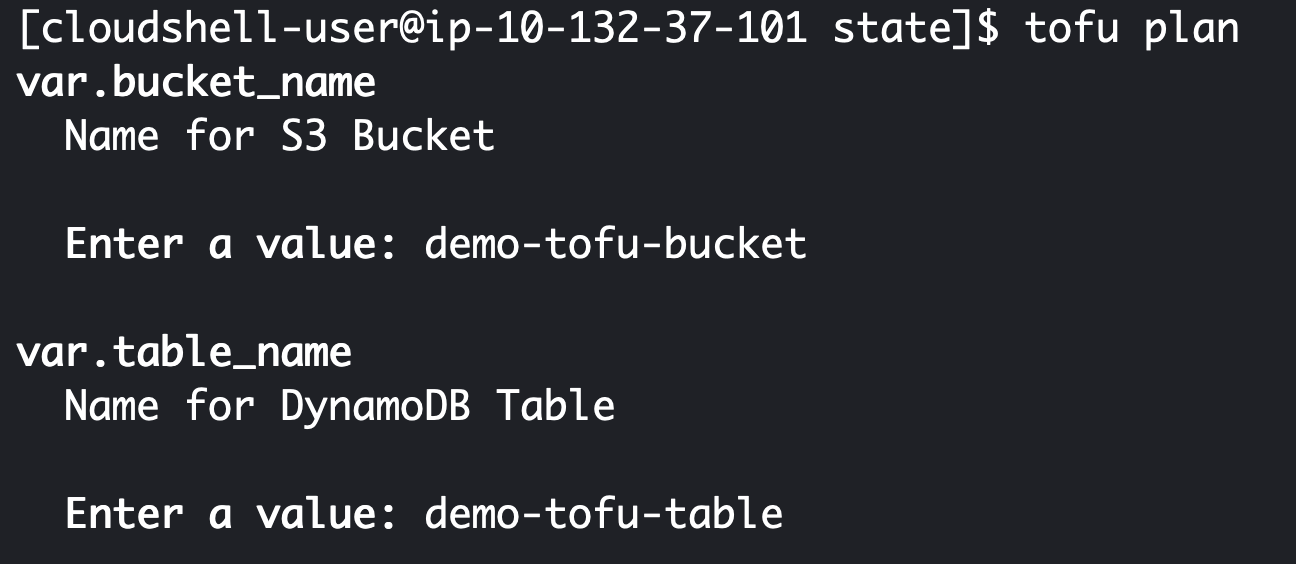
At this point you'll get prompted to enter and bucket and table name on the command line. As you can see I called mine demo-tofu-bucket and demo-tofu-table. You'll need to pick different values and remember them for the next part of this lab.
Once complete you should see two resources have been created sucessfully!
Configuring remote state for a stack
Now lets use these resources and create our example stack again. We are going to edit the versions.tf file in our code directory:
cd ../code
vi versions.tf
We'll add this code, but remember to change your bucket and dynamodb_table values to what you set in the last section.
  backend "s3" {
    bucket         = "demo-tofu-bucket"
    key            = "terraform-tofu-lab/terraform.state"
    region         = "eu-west-1"
    acl            = "bucket-owner-full-control"
    dynamodb_table = "demo-tofu-table"
  }
So the resulting file looks like this:
  terraform {
  required_version = ">= 1.0"

  required_providers {
    aws = {
      source  = "hashicorp/aws"
      version = ">= 4.66.1"
    }
  }

  backend "s3" {
    bucket         = "demo-tofu-bucket"
    key            = "terraform-tofu-lab/terraform.state"
    region         = "eu-west-1"
    acl            = "bucket-owner-full-control"
    dynamodb_table = "demo-tofu-table"
  }
}
Now lets go ahead and use it. We start with:
tofu init
You should see that terraform/tofu automatically uses S3 as the new state backend as comfirmed here:
Now you are clear to run plan and apply and enter yes at the prompt.
tofu plan
tofu apply
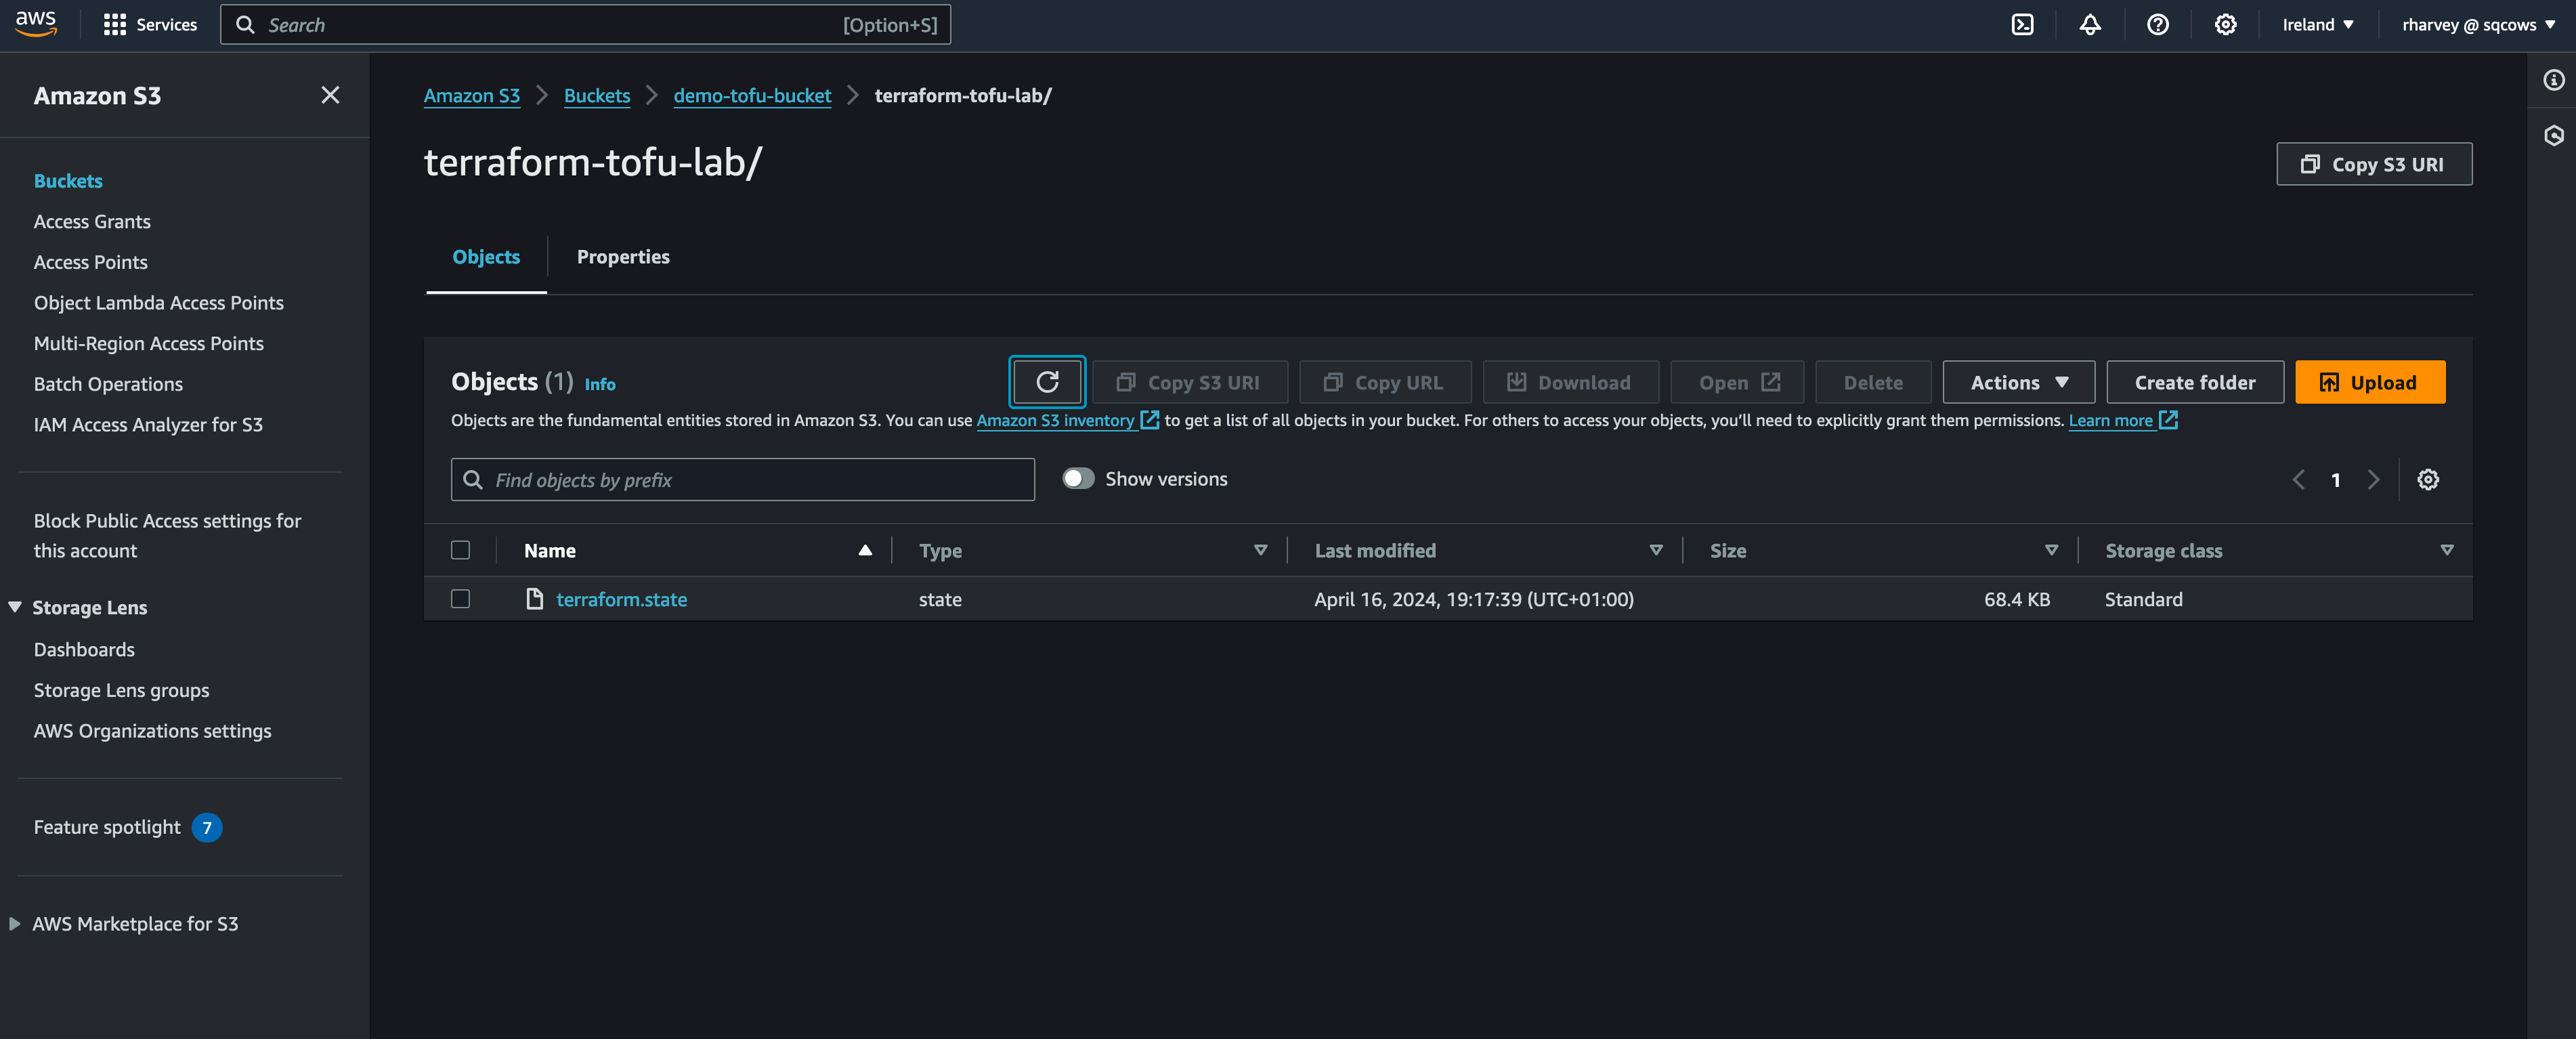
Now you'll notice theres no longer a terraform.state file clogging up you disk space on CloudShell and if you use your browser to go to the AWS console and the the S3 service followed by your bucket name you created you should see a terraform.state file in there.
You won't see much in dynamoDB unless you are currently in the middle of an apply but that value of LockID gets set when you are updating or deploying the stack to avoid others overwriting the file in S3.
Thats it you're done! You now have remote state configued for use on AWS using DynamoDB and S3, this means more than just you can operate your stack deployed by terraform/tofu which is essential for teams. If you want to lookinto other ways of storing state check out the documentation here: https://opentofu.org/docs/language/state/remote-state-data/
Clean up
Lets clean up your resources now:
tofu destroy
Enter yes at the prompt. We'll leave your state S3 bucket and dynamoDB table there for now as we'll use it in lab 5.
Recap
What we've learnt in this lab:
- Why remote state is important
- How to create a bucket and dynamoDB table for use in storing state
- How to use those resources to store state from another stack


